
Brain Tanning
A Comprehensive Guide to Preserving Wild Game Hides.
9/7/20233 min read
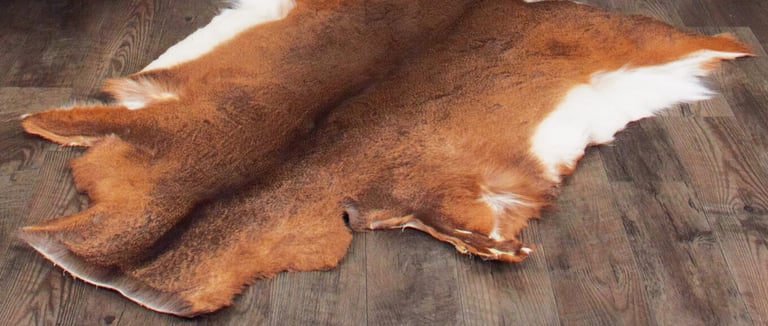

Brain tanning is a traditional method of tanning hides that has been used for centuries by indigenous cultures the world over. This process utilizes the natural oils found in animal brains to soften and preserve the hides, resulting in supple and durable leather. It is said that every animal has enough brain matter to tan its own hide, and this has held true in our personal experiences. In this detailed instructional article, we will guide you through the steps of brain tanning wild game hides, allowing you to transform raw hides into beautiful and functional leather.
Materials Needed:
Freshly harvested wild game hide
Brain from said animal.
Salt
Water
Fleshing knife or scraper
Large plastic container or drum
pH testing strips
Softening agent- We prefer neatsfoot oil over commercial leather conditioner. But, this is a personal preference.
Basic PPE & tanning tools (gloves, goggles, apron, etc.)
Fleshing and Skinning- Begin by removing any excess flesh, fat, or membrane from the hide using a fleshing knife or scraper, taking care not to cut through the skin. Once the fleshing is complete, carefully skin the animal, ensuring you have a clean and intact hide.
Salt Preservation- Lay the hide flat on a clean surface and generously sprinkle salt on both sides. Rub the salt into the skin, paying extra attention to the edges and folds. Fold the hide in half, with the flesh sides facing each other, and roll it up. Place the rolled hide on a plastic sheet or tarp and let it sit for 24-48 hours. The salt will draw out moisture, helping preserve the hide.
Braining- After the preservation period, unroll the hide and shake off excess salt. Prepare the brain by removing any excess tissue or membrane. Mash or blend the brain until it forms a smooth paste-like consistency. Apply the brain paste liberally to the flesh side of the hide, ensuring even coverage. Massage the brain into the hide, working it in thoroughly. The natural oils in the brain will penetrate the hide, softening and preserving it.
Soaking- Once the brain has been applied, fold the hide with the flesh sides facing each other and roll it up. Place the rolled hide in a large plastic container or drum. Fill the container with enough water to fully submerge the hide. Allow the hide to soak for 24-48 hours. This soaking process helps distribute the brain oils evenly throughout the hide.
Scraping and Stretching- Remove the hide from the water and lay it on a clean surface. Using a dull knife or scraper, gently scrape off any excess brain paste and flesh residue. Be careful not to damage the skin. Repeat the scraping process until the hide is clean and smooth. Next, stretch the hide to its desired size and shape. This can be done by securing the hide to a frame or stretching it by hand. Stretching helps align the fibers and ensures an even and consistent texture.
Drying and Softening- Hang the stretched hide in a well-ventilated area away from direct sunlight or heat sources. Allow the hide to air dry completely. This drying process may take several days or even weeks, depending on the size and thickness of the hide. Remember those hides on grandpas barn wall? Once the hide is dry, it may feel stiff. To soften the tanned hide, you can use a softening agent like neatsfoot oil or a commercial leather conditioner. Apply the softening agent to both sides of the hide and work it in gently. This will make the leather more pliable and supple.
Finishing Touches- After the hide has been softened, you can further enhance its appearance and durability by applying leather finishes or dyes. Follow the instructions provided with the specific product you choose. This step is optional and depends on your desired outcome.
Brain tanning wild game hides is an extremely labor-intensive process that yields beautiful and functional leather, to say nothing of the rewarding feeling. By following these step-by-step instructions, you can transform raw hides into soft and durable leather using traditional methods that date back through the centuries. Remember to exercise patience and attention to detail throughout the entire process. With practice and experience, you'll be able to create high-quality brain-tanned leather with any size game you harvest.
Thanks for Reading! Get Prepped!