Building Your Bunker
A Prepper's Guide to Constructing an Underground Shelter
8/29/20233 min read


In today's world, having a secure shelter can mean the difference between survival and disaster. An underground bunker provides protection that no above-ground structure can match, if properly constructed. While this is not a beginner's project, constructing a bunker is within reach of most determined preppers. This guide is only a starting point, but will walk you through the entire process from site selection to finishing touches. Professional installation is always advised, but with adequate research and skills, this can very well be a rewarding DIY project. The following outline is also just our recommendation based on projects with which we've been involved. Let's dig in. (See what I did there?)
Site Selection
Choosing the right location is critical to the success of the entire project, as well as your very survival. Remember, we are building a shelter, not a death trap so, let's do this right. Evaluate potential sites for soil stability, drainage, and low risk of flooding or landslides. Avoid areas near utility lines by adhering to your local "call before you dig" policy, if applicable. Consider accessibility during emergencies. Obtain any required permits and ensure your plans comply with local regulations.
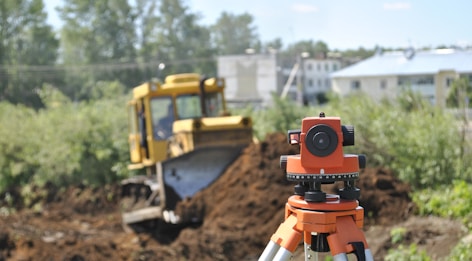
Excavation and Site Prep
Clear vegetation from the selected site, including the roots. Use heavy equipment like an excavator if possible, or, for the more ambitious and physically fit, dig the area out by hand. For headroom, we recommend excavating to a minimum depth of 6-8 feet, though more is better if soil conditions allow. Install bracing like wooden supports as you dig to reinforce the walls. Compact and level the excavated floor using gravel or concrete.
Foundation and Wall Construction
Pour a 6-8 inch thick reinforced concrete slab for the floor, using rebar on all sides. Erect plywood form walls inside the excavation and add rebar reinforcement before pouring 8-inch thick concrete walls. Waterproof the outside using sealants that are also rated for long term ground contact. Consider steel reinforcement in high-stress areas like entrances. Give your concrete ample curing time. Once cured, remove forms from inside the walls.
Ventilation and Utilities
No one can survive long without fresh air and power. We recommend extensive research regarding ventilation prior to installing any system. That said, we recommend a filtered ventilation system using 4-6 inch PVC pipes with intake and exhaust ports, both high enough above ground level to avoid filling during heavy rains. It would also be a good idea to ensure it blends with the environment. You know, because pesky zombies. Add a manual or electric fan if needed. Run electrical lines from your power source (solar, generator, etc.) and install outlets. We advise seeking the assistance of a professional electrician . Plumb in a water collection/purification system and storage tanks as they relate to your needs. And, the same with a composting or incinerating toilet.
Interior Framing and Insulation
Frame interior walls as needed to separate rooms. Add a finished ceiling using drywall, wood panels or concrete. Insulate your walls and ceiling with rigid foam boards. Install a vapor barrier to prevent moisture issues. Lay down flooring like tile, vinyl or sealed concrete. Add lighting, either electric or non-electric options. LED is a great option, as it consumes less electricity.
Interior Finishing
Equip the bunker with furnishings like cots, shelves, cabinets and a table. Don't forget essential items like a first aid kit, fire extinguisher, AM/FM radio and backup power sources. Label all switches, breakers and systems clearly. Store a long-term supply of non-perishable and dehydrated/freeze dried foods, water and other essentials. The rest is really a series of personal choices.
Entrance and Security
Reinforce the entrance heavily using steel plates within a concrete frame. Install multiple high-security locks and consider options to bar the door from inside. Camouflage the entrance hatch from above and add a ventilation port that can be sealed shut. A hidden escape tunnel as a backup exit is HIGHLY recommended! Let's say we know of instances where multiple exits proved beneficial.
With thorough planning and solid construction, you'll gain a safe, secure shelter to weather any crisis. Regularly inspect, maintain and replenish your bunker to keep it prepped and ready when needed most. Stay vigilant - and may your bunker never see use, but give you peace of mind.
Thanks for reading! Get Prepped!