
Raised Bed Gardening 101
Why You Should Build Raised Garden Beds
4/1/20244 min read

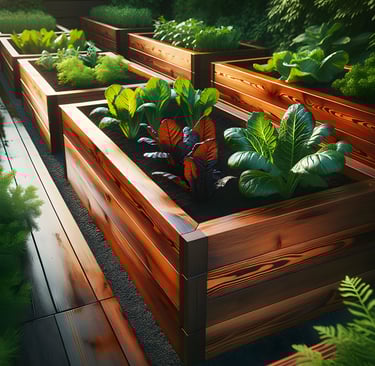
If you're looking to start a vegetable garden, raised beds are an excellent option to consider. Raised bed gardening has soared in popularity in recent years, and for good reason - it offers a wide range of benefits over traditional in-ground gardens. From better drainage to fewer weeds and pests, the advantages of raised beds make gardening more productive, eco-friendly, and enjoyable. In this article, we'll dig into (see what we did there?) the top benefits of raised bed gardening and provide a materials list to help beginners get started.
Better Drainage and Soil Control
One of the biggest advantages of raised beds is that you have complete control over the soil quality and drainage. In an in-ground garden, you're stuck with whatever native soil is present, which may be dense clay, nutrient-poor, or prone to waterlogging. With a raised bed, you build the ideal soil blend using a mix of topsoil, compost, and other amendments. This ensures your plants have a fertile, well-draining environment to thrive. The raised design also allows excess moisture to drain away more readily, preventing issues like rot, fungus, and soil compaction. If you live in an area with heavy rains or poor drainage, raised beds are a game-changer.
Easier Access and Reduced Strain
Tending to an in-ground garden often requires bending, kneeling, and straining your back - a literal pain for those with limited mobility or knee/back issues. Raised beds, typically 1-3 feet off the ground, allow you to garden while standing upright or sitting on a stool. This ergonomic advantage makes gardening more accessible for seniors, those with disabilities, and anyone looking to avoid discomfort. Additionally, with no need to step into the bed itself, you eliminate soil compaction. Compacted soil can inhibit root growth, water drainage, and overall plant health. The loose, fluffy soil in a raised bed is a plant's dream environment.
Less Weeding and Pest Trouble
If you've grown frustrated with constant weeding in the past, raised beds offer a refreshing change of pace. The enclosed design and raised height create a physical barrier that deters weed seeds from taking root as easily. Many gardeners add a thick layer of mulch or landscape fabric to further suppress weeds. Over time, the weed density decreases dramatically compared to an in-ground garden. Raised beds can also help mitigate issues with certain soil-borne pests like gophers, moles, and ground-nesting insects. The enclosed bed prevents these critters from burrowing up into the soil and damaging plants/roots. Pests are still possible from the air (e.g., aphids), but dealing with them is often simpler thanks to the bed's contained space.
Maximize Space and Yields
Even if your outdoor space is limited, raised beds enable you to grow an impressive amount of produce. Their vertical design puts all available square footage to use, allowing you to pack in more plants than a traditional row garden. There's no need to leave walkways between rows, so you truly maximize your growing area. Not only do raised beds produce higher yields per square foot, but many gardeners find their plants grow larger and more vigorous too. This is thanks to the ideal conditions: nutrient-rich soil, ample drainage, fewer pests/weeds, and deeper, less-compacted root zones.
Extended Growing Season
Another terrific perk of raised bed gardening? The ability to extend your growing season in spring and fall. Because the soil is elevated and better-draining, it warms up earlier in spring compared to the cold ground. Conversely, the raised bed loses heat more slowly than the ground in fall, allowing plants to thrive weeks longer before the hard frosts arrive. Many gardeners cover their raised beds with mini greenhouse "hoop tunnels" to provide an added insulating layer of protection. With the right timing and season extension techniques, it's possible to harvest fresh greens, root crops, and more nearly year-round in some climates.
Beginner Materials List
Ready to start your own raised bed garden? Here's a basic materials list to build one 4x8 foot raised bed:
- 8 Untreated cedar boards (1" x 8" x 8') *cedar is naturally weather/rot-resistant, as well as repels a variety of pests.
- Box of 3" exterior screws
- Staple gun & landscaping fabric *optional for weed barrier
- Wheelbarrow or 2-3 buckets of quality topsoil/compost mix
- Seeds, seedlings, or starter plants of your choice and region.
Tools Needed:
Drill
Circular Saw or Handsaw
Measuring Tape
Pencil
Safety Glasses
Instructions:
Cut the Boards: Using the circular saw or handsaw, cut the cedar boards to the following lengths:
2 boards at 8 feet long (for the long sides)
2 boards at 7 feet long (for the short sides)
4 boards at 3.5 feet long (for the corners)
Assemble the Frame: Lay out the two 8-foot boards parallel on a flat surface, spacing them 4 feet apart. Position a 3.5-foot board across each end, creating a rectangular frame.
Secure the Frame: Pre-drill holes through the end of each 3.5-foot board into the long 8-foot boards. Drive 3" exterior screws through the pre-drilled holes to secure the corners. Make sure the frame is square.
Add the Front & Back: Stand the assembled frame up on its side. Position the two 7-foot boards between the ends and secure them in place with 3" exterior screws, spacing the screws every 8-12 inches.
Install Landscaping Fabric (Optional): If using landscaping fabric as a weed barrier, unroll it now and cover the interior bottom of the raised bed frame. Use the staple gun to attach the fabric to the inside of the boards, pulling it taut.
Move the Bed: With a helper, carefully move the assembled bed frame to its desired location. Make sure the site receives ample sunlight if growing sun-loving plants.
Level the Bed: Use a level to ensure the bed is level from all sides. Adjust as needed by repositioning the frame or tamping down high spots in the soil beneath.
Fill with Soil: Fill the bed with the topsoil/compost mix to the desired depth, leaving a few inches from the top edge. Mix in additional amendments like fertilizer, peat moss, etc. if desired.
Plant! Once filled, the raised bed is ready for planting seeds, seedlings or starter plants. Reference spacing recommendations for each crop and plan out your layout.
Water Well: Give the newly planted bed a deep, thorough watering to settled the soil and water in the plants/seeds.
Optional Steps:
Line the interior sides with landscaping fabric if desired to minimize soil falling out between board cracks.
Install trellising, cages or other support structures as needed for vining crops like cucumbers or tomatoes.
Add finishing touches like a trellis, decorative edging, or capped corners for a more polished look.
With quality cedar boards and the right preparation, this 4x8 raised garden bed should last for many productive growing seasons to come! Let the joys of raised bed gardening begin. DIG IN!
Thanks for reading! Get Prepped!